-
Make the cake layers: Preheat the oven to 350°F. Coat three 9×2-inch round cake pans with flour-based baking spray (or grease and flour). In a large saucepan (3 quart or larger), combine the butter, oil, chopped chocolate, and 1 cup water. Heat over medium heat until melted.
-
In a large mixing bowl, whisk the flour, sugar, and cocoa powder. Pour the hot chocolate mixture into the sugar mixture and whisk until combined. Whisk in the eggs, one at a time, then whisk in the buttermilk, vanilla, baking soda, and salt. Divide the batter evenly among the prepared pans.
-
Bake for 35-40 minutes, or until a toothpick inserted in the center of each cake comes out clean. Cool on wire racks for 10 minutes. Invert the cakes onto the racks, remove the parchment, and cool completely.
-
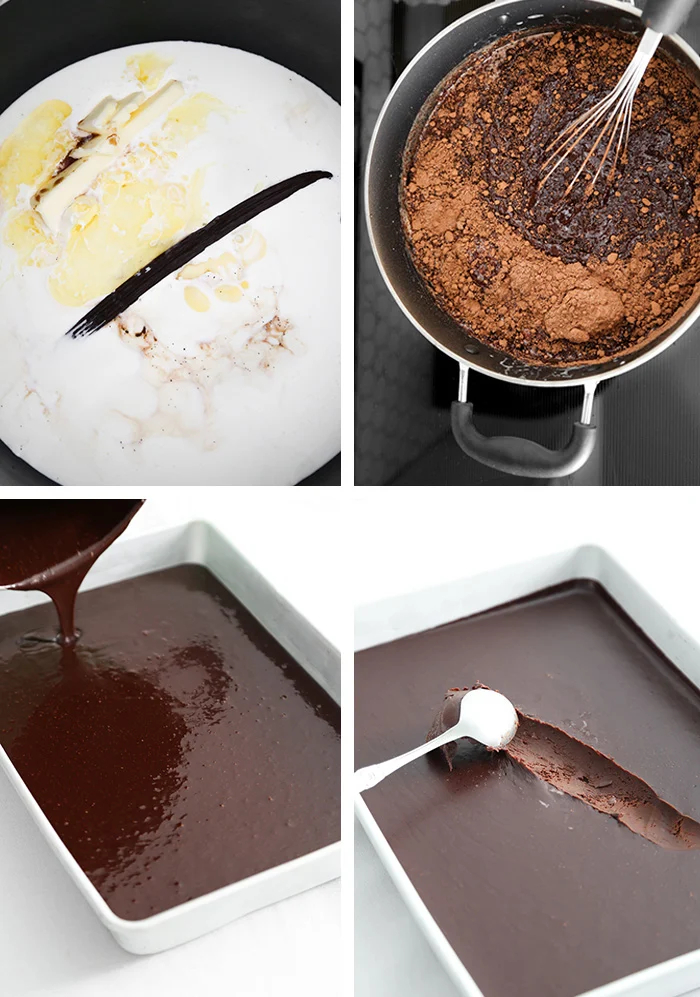
Make the frosting: In a large (3+ quart) saucepan over low heat, combine the cream, butter, and vanilla bean and seeds and stir until the butter is melted. Remove the vanilla bean and whisk in the chopped chocolate until melted. Whisk in the sugar, cocoa powder, syrup, and salt until smooth—be sure the cocoa powder dissolves completely. Pour into a 9×13-inch pan and freeze until firm, about 2 hours, or refrigerate overnight.
-
Make the marshmallows: Lightly spray an 8-by-8-inch baking pan with cooking spray and wipe away any excess with a paper towel.
-
Let the gelatin dissolved in cold water stand for at least 5 minutes.
-
In a medium saucepan, stir together the sugar, 1/4 cup corn syrup, 1/4 cup water and salt and place over high heat. Boil, stirring occasionally, until the temperature reaches 240°F. Meanwhile, pour the remaining 1/4 cup corn syrup into the bowl of an electric mixer fitted with the whisk attachment.
-
Microwave the gelatin on high until it is completely melted, about 10-20 seconds. Pour it into the corn syrup. Set the mixer to low, and keep the mixer running while you check the sugar syrup.
-
Once the syrup reaches 240°F, remove it from the heat. Keeping the mixer on low, slowly pour the syrup into the gelatin mixture in a steady stream, aiming for the space between the beater and the bowl. Increase the speed to medium and beat for 5 minutes. Raise the speed to medium-high and beat for 5 more minutes. Beat on the highest setting for 1 to 2 minutes more and beat in the vanilla extract until you reach the level of flavoring you like; the finished marshmallow will be opaque white, fluffy, and roughly tripled in volume.
-
Pour the marshmallow into the prepared pan. Use an offset spatula to nudge it into the corners and smooth the top. Sift coating evenly and generously over the top. Let set for at least 2 hours in a cool, dry place. When the marshmallow has set, use a knife to loosen the marshmallow from the edges of the pan. Invert the marshmallow slab onto a coating-dusted work surface and dust it with more coating. Cut into large squares and dip the sticky edges of the marshmallows in more coating, patting off the excess.
-
Assemble the cake: Remove the frosting from the freezer or refrigerator. Scrape it into the bowl of a stand mixer fitted with the paddle attachment and beat on medium speed for 2 minutes to soften. Change to a whisk attachment and beat at medium-high speed until light and fluffy, about 3 minutes.
-
Put a cake layer on a flat serving platter or a cake stand lined with strips of waxed paper to keep it clean while icing. Top the layer with 1 cup of the frosting, spreading it evenly with an offset spatula to the cake’s edge. Repeat with another cake layer and 1 cup frosting. Top with the last cake layer.
-
Use the remaining frosting to cover the outside of the cake; apply it in large swirls using an offset spatula. Refrigerate the cake until the frosting firms, about 20 to 30 minutes.
-
Pile the marshmallows on top of the cake and brown them using a chef’s torch. If you do not have a chef’s torch, you may transfer the marshmallows to a lightly grease baking sheet and brown them under a preheated oven broiler. Allow the toasted marshmallows to stand until firm enough to transfer to the top of the cake.

